Managing your community’s Locations from your Dashboard
Locations can be mapped in the Map Your City mobile app or added using the Dashboard. This article describes how you can add and manage locations for your communities from your Dashboard.
The Dashboard allows you – as an owner of an Organization – to manage all locations for your community. Just a note to remember: The locations that you mapped personally for any Organization (as member or owner) – show up in the Map Your City mobile app under My Locations.
If you need to know how you and your members can map Locations from the Map Your City Mobile app, this is a helpful video to refer to
Here’s the tools you will be using in this step and the details to help you map locations.
Map Your City app
The Map Your City app is a map where Explorers and Storytellers meet. No, not the kind of map with boring pins and street names. It’s a new kind of map that’s connected to the communities you love and the world. People use it every day to explore, talk, play, learn — and map some places, too.
The Geo Locator
The Geo Locator helps you to map locations in Map Your City. It retrieves coordinates, street names and all other geo-information in a jiffy. If you want you can use the Google street view image or Google search to make finding a location easier.
The Dashboard Locations menu
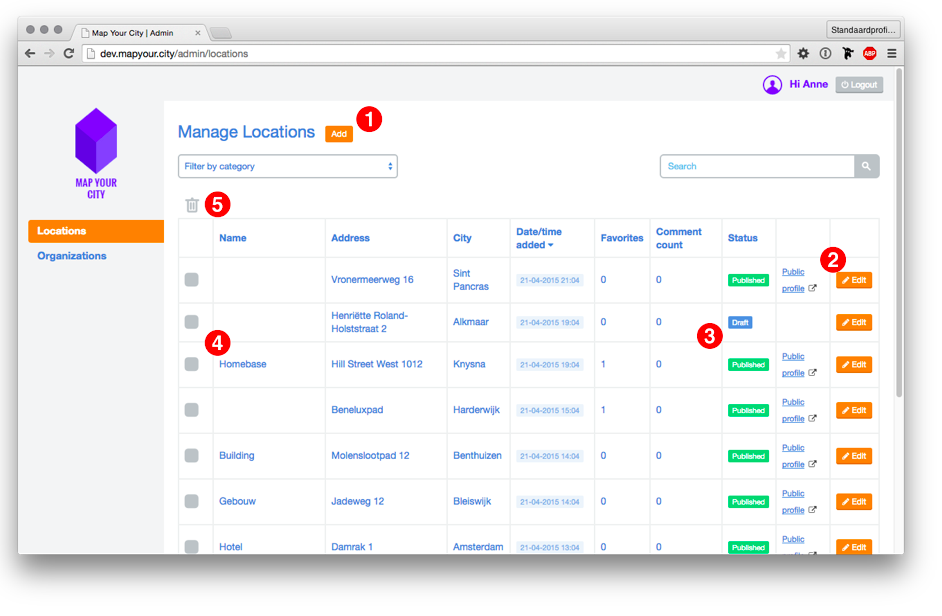
- In the menu on the left side you can find all the existing locations on Map Your City. You can search to see if your preferred location’s address is already on the on the list. If you want to add a new location that is not on the map already, simply click on the “Add” button.
- If you would like to edit or view an existing location, click on the “Edit” button of the location you would like to edit.
- The “Status column” tells you if the location is published or is still in draft mode. After you have edited the location you can publish it.
- You can select multiple Locations
- Clicking the “Trash” icon deletes one or more locations that you added. But be aware this also deletes any information you or your users have added to that location.

All locations in on the MYC Map in list view
How to add locations to Map Your City from your Dashboard
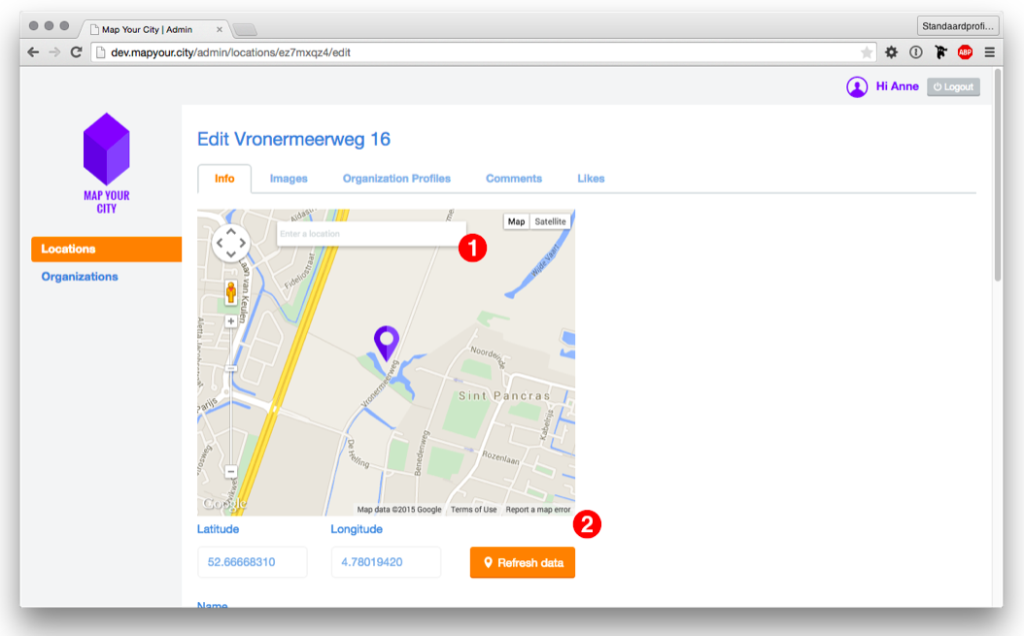
- After you have clicked the “Add” button, you can find an address just like on Google Maps.
- Click on “Refresh Data” and the address appears in the fields below.
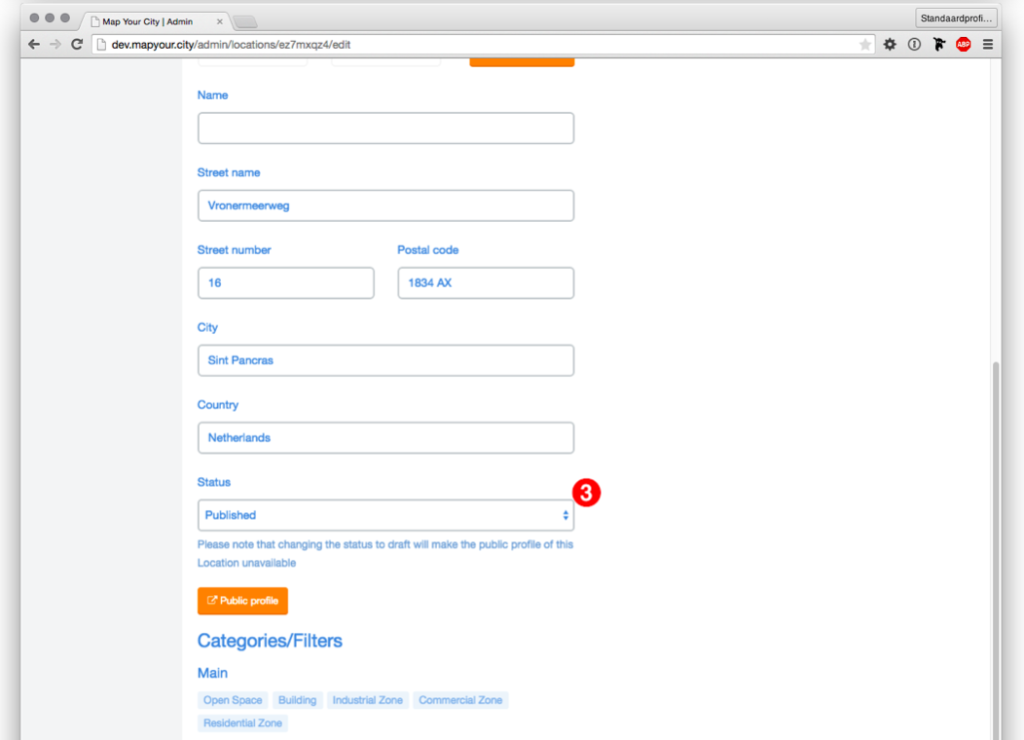
- Select “Published” if you want to publish the location on the map.
- After you are done, be sure to click the “Save Changes” button

Add a location in your Dashboard…

…and publish it.
Adding images to a location from your Dashboard
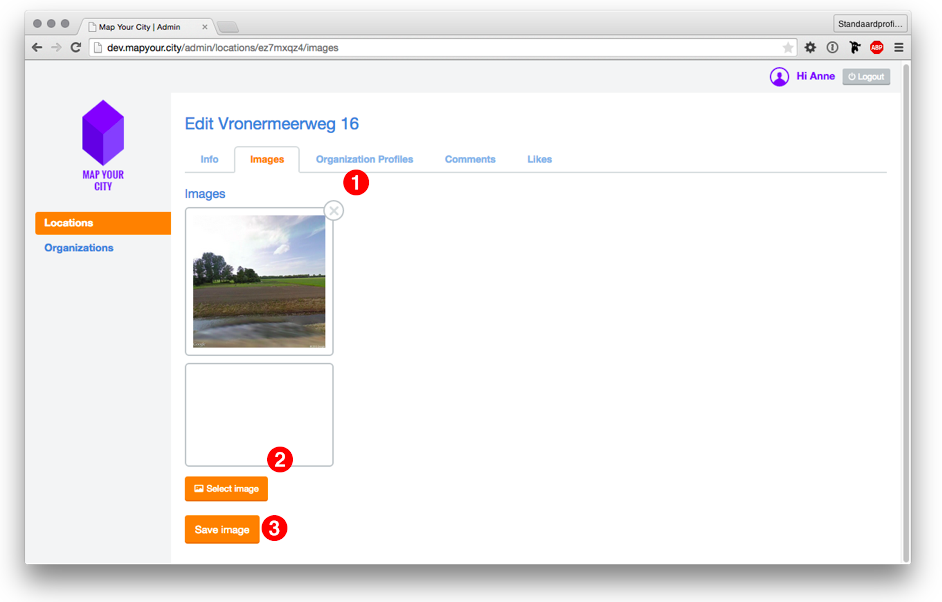
- By default the Google Street View Image is used, when you add a Location in your Organization Dashboard.
- You can add new images by clicking on “Select image” . This will add the new image to the Photo Slider in the app.
- Click the “Save image” button to save your newly added image and to add another.

Adding images to a location
Hop on over to the next step to personalize your locations with your stories and start linking to your website, booking or ticket sales provider, and start creating your community’s Web map.
Common Questions
How do I import an existing location portfolio?
- When you already have a CMS or a location portfolio digitally stored, you can send us your portfolio in .csv format. We will import it for you and add it to your Organization.
- You can use this template or just contact us if you would like to have your profile imported for you
How can we map locations from the mobile app?
Mapping locations from the Map Your City mobile app is incredibly simple. If you would like to explain how this works to your community of owners and members this is a helpful video to refer to.
How do we add information to our locations?
We love your enthusiasm. So hop on over to the next step. We’ll explain in detail in the next section how that is done. It is important you have completed your form using the Form Builder in the previous section.


